Getting started
Installation
- Install application from monday.com apps marketplace.
First Time Use
-
Add Update with Excel / CSV to the board and configure the "Item ID" column following the onscreen instructions.
-
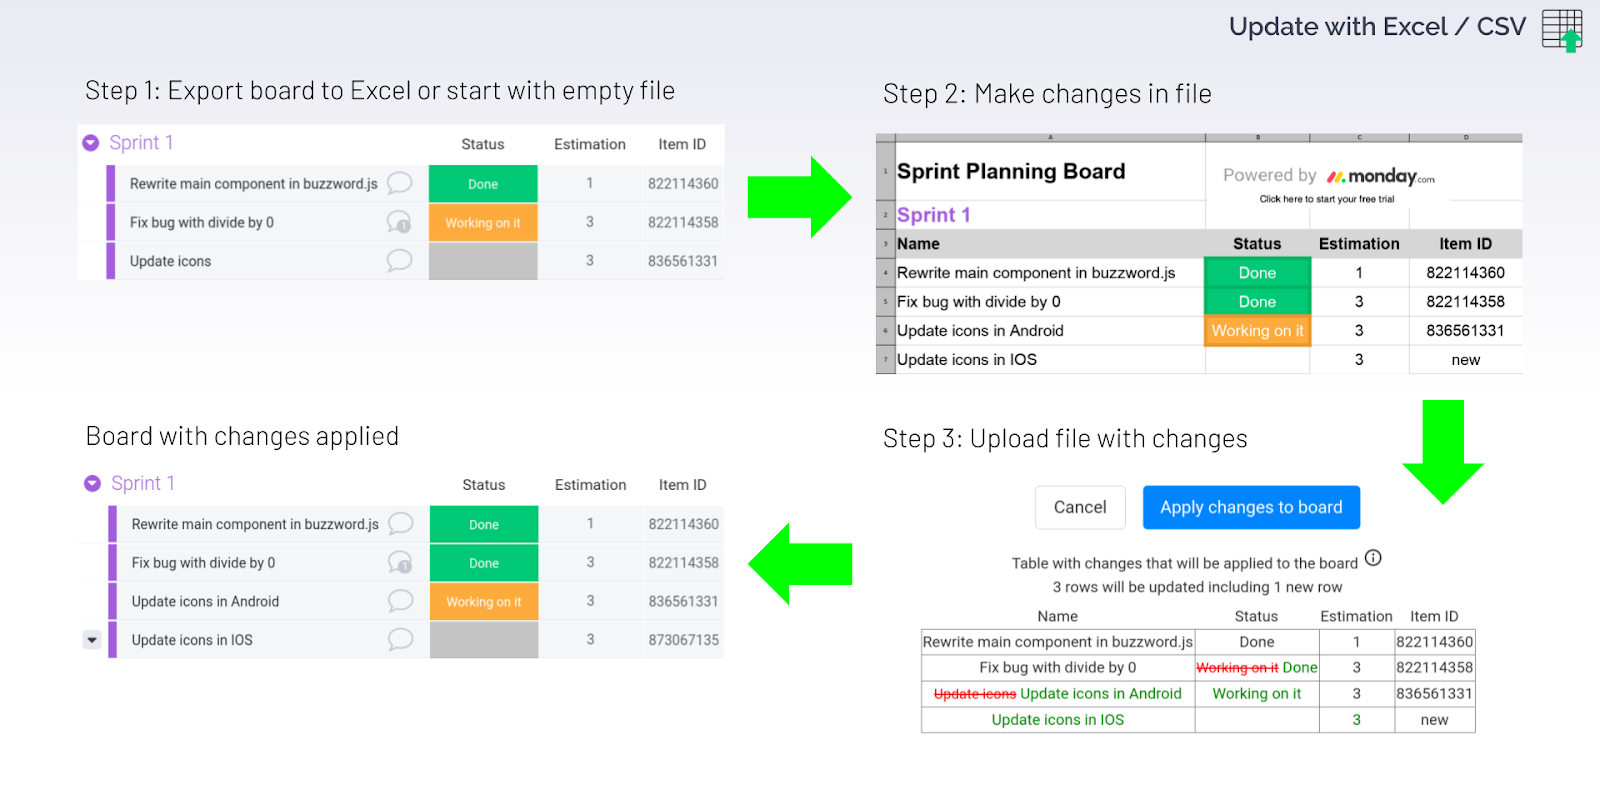
In order to upload an Excel or CSV file to make changes on the board follow this 3-step process:
- Step 1: Export the board to Excel or start with an empty file.
- Step 2: Make changes in the Excel or CSV file.
- Step 3: Upload file with changes to the board.
Video content:
- overview
- installation steps
- adding item id column, it also can be done in settings
- export board to Excel
- changes in Excel file to add 15% to estimation values
- upload changes to board
Step 1: Export board to Excel
-
"Item ID" column is required on the board.
-
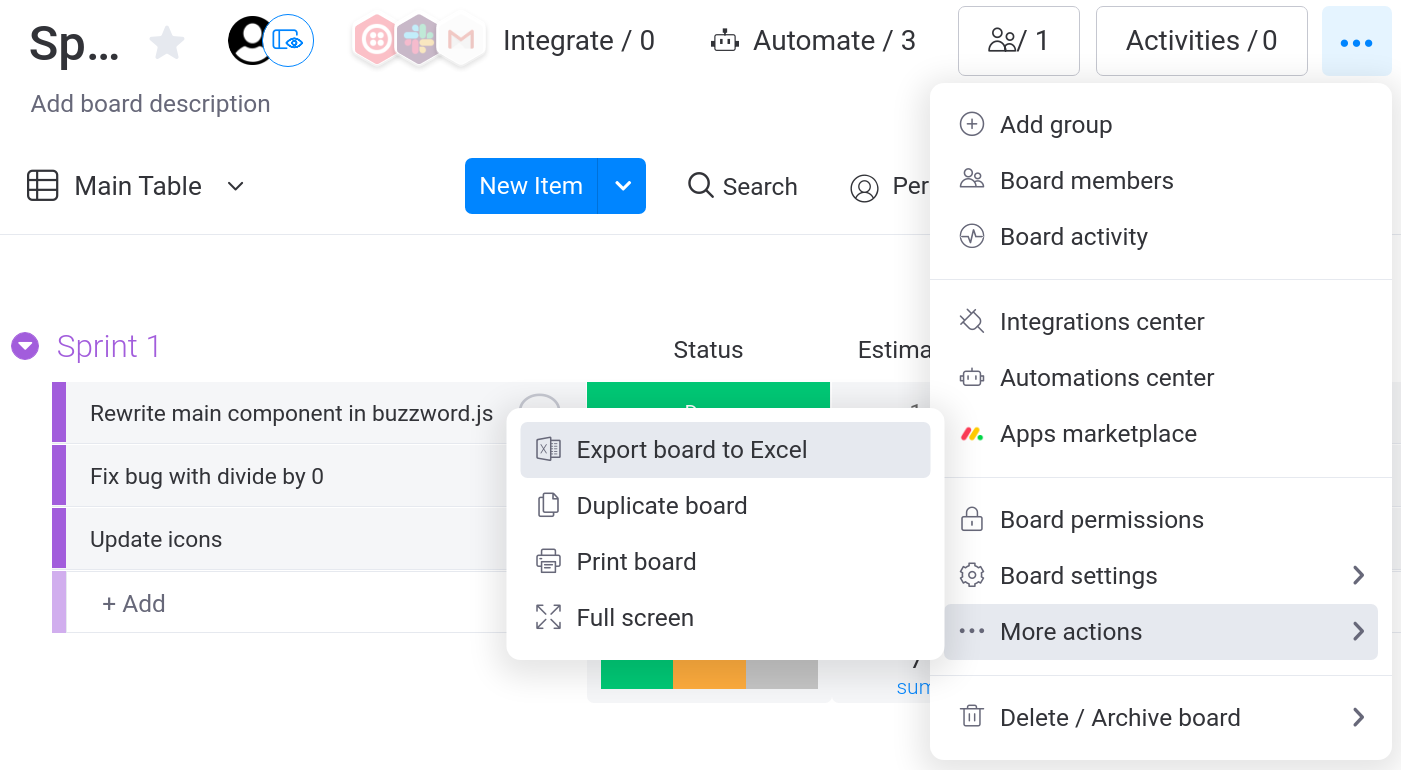
Select "Export board to Excel" from the board menu. If you prefer to start with a new file (without exporting) see Advanced section below.
Step 2: Make changes in the Excel or CSV file
- "Item ID" column is required in the file, other columns are optional.
- Application is reading text values, background color and font formatting are not used.
Original file:

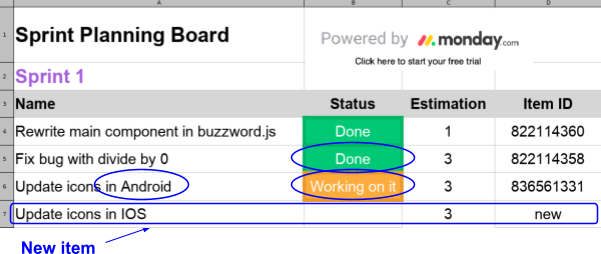
Excel file with example changes:
- "Fix bug with divide by 0" status was changed to "Done",
- "Update icons" was renamed to "Update icons in Android" and status was changed to "Working on it",
- New "Update icons for IOS" was added with estimation value set to 3.
Adding new items
- Add a new row in the Excel file (see last row in example above).
- Enter "new" in the "Item ID” column.
- Add values to other columns.
Updating existing items
- Make changes by typing text, using functions or formulas.
Deleting items
- Remove rows with items in Excel file.
- Select “enable delete for items not present in the file” before applying changes (see Review Changes section).
- Note that after applying changes with delete enabled, monday board will only have items that are present in the Excel file, other items will be removed from the board.
Working with groups
Moving items between existing groups
- Move row with item to other existing group in Excel file.
Move items to new group
- Move row with item to new group in Excel file.
Create new items in existing group
- Add row following "Add new items" section above.
Crete new items in a new group
- Add new group name following with column titles.
- Add row following "Add new items" section above.
Step 3: Upload changes to the board
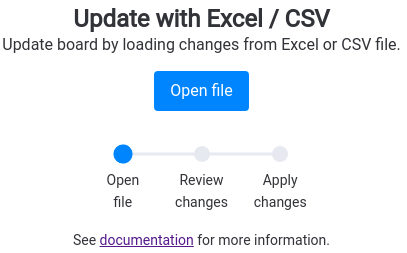
Open file
Review Changes
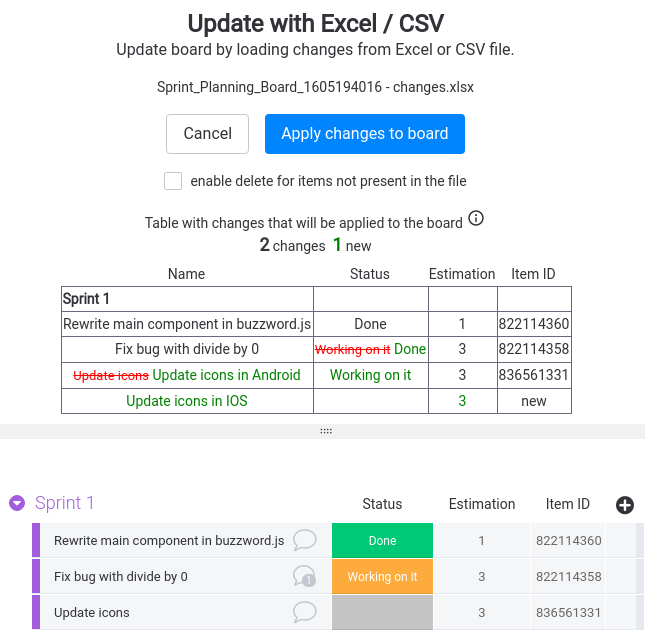
List of changes and summary will be displayed.
Apply Changes to the board
Press "Apply changes to board" button.
After applying changes our example board will look like on the photo below. It will have status and name updated, and one new item.
